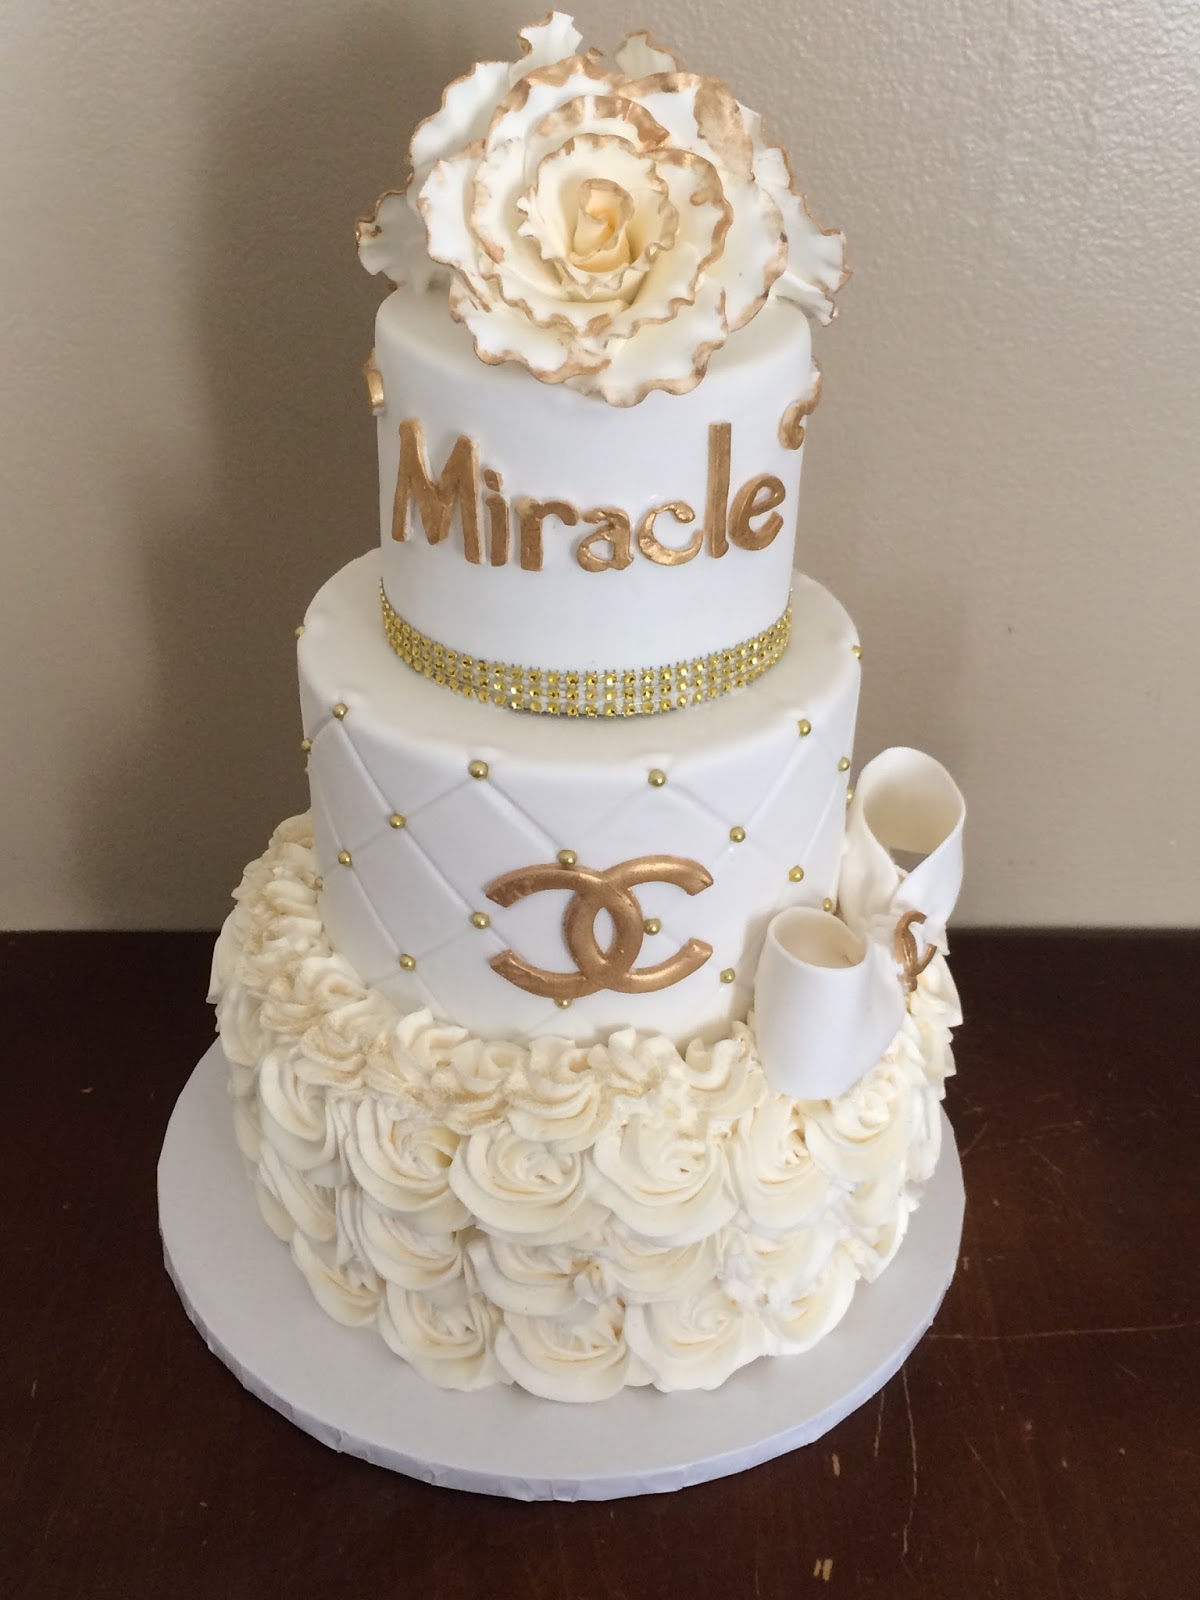
Well another busy week of caking has past and I am back to showcase like I said I would the white and gold version of the pink and silver chanel cake from the other week. I actually think I like this version better. I think it may because of the combination of white and gold gives it an air of sophistication. You all can let me know what you think.
Its a 3 tiers covered in white fondant with gold accents on the top two tiers. Each tier is a different flavor; chocolate, vanilla and red velvet in the order. The bottom tier has buttercream rosettes and then sprinkled with gold glitter to give it some extra shine.
The top tier has gold rhinestone banding around the bottom. The bow is made from gumpaste and has the chanel logo in the middle. The middle tier has gold edible beads at each intersection point of the quilted pattern.
The hubby delivered the cake and he said the client was so happy as this was all done over the internet because she lives in a different state and was coming up for her sister's baby shower. Love when everything works out and the clients are super pleased with their cakes.
Until next time...
Showing posts with label buttercream. Show all posts
Thursday, March 2, 2017
Thursday, February 16, 2017
I'm Back!!!!!!!
I AM BACK!!!!!!!!!!!!!!!!!!!!!!!!
As the title states I am back to blogging about cakes again! Life is funny and sometimes you have to roll with the punches.. You are probably like is she still doing cakes? YES! I never stopped doing cakes. I just have been very very busy over the last 2 years with life and raising a family and starting another business.. yes I started another business. Its a natural extension of what I do now so it wasn't a huge surprise to my family and friends. So I now run Kima's Konfections as well Kima's Paper Craft Creations! So I make papercrafts like party decor and other items like scrapbook mini albums that I see online and at craft fairs. So all of that is reason why I have been a very bad blogger:( But the haitus is over now and I am back to blogging about cakes. I might do some party spotlights here and there again since I have branched out am working with a number of local event planners here in Philadelphia so you will still some of that. And I am working on some more exciting news that I can't say yet as it is still being worked out but as soon as everything is finalized I will be blogging about it:)
Since I have done so many cakes over the last two years, I will just randomly start with a few more recent cakes and then go back to show some my favorites. Well this pretty was done back in January for a client in NJ (yes I do take clients that live close to Philadelphia in NJ). Its 3 tiers of vanilla bean cake with vanilla bean buttercream filling. I made crown myself over 2 days and let it dry and then brushed it with silver lust dust. I the same thing to the name and the other silver accent pieces on the cake. The bottom tier is a buttercream rosette design. The middle tier is a quilted pattern with silver dragees and then the top tier is all white with rhinestone wrap around the bottom.
This cake is pretty popular on my Facebook page which has got a slight overhaul and you can find it here, so much so that I am doing this cake again this weekend except in white and gold! So you know I will come back with pictures just to show the constrast of the two cakes.
As the title states I am back to blogging about cakes again! Life is funny and sometimes you have to roll with the punches.. You are probably like is she still doing cakes? YES! I never stopped doing cakes. I just have been very very busy over the last 2 years with life and raising a family and starting another business.. yes I started another business. Its a natural extension of what I do now so it wasn't a huge surprise to my family and friends. So I now run Kima's Konfections as well Kima's Paper Craft Creations! So I make papercrafts like party decor and other items like scrapbook mini albums that I see online and at craft fairs. So all of that is reason why I have been a very bad blogger:( But the haitus is over now and I am back to blogging about cakes. I might do some party spotlights here and there again since I have branched out am working with a number of local event planners here in Philadelphia so you will still some of that. And I am working on some more exciting news that I can't say yet as it is still being worked out but as soon as everything is finalized I will be blogging about it:)
Since I have done so many cakes over the last two years, I will just randomly start with a few more recent cakes and then go back to show some my favorites. Well this pretty was done back in January for a client in NJ (yes I do take clients that live close to Philadelphia in NJ). Its 3 tiers of vanilla bean cake with vanilla bean buttercream filling. I made crown myself over 2 days and let it dry and then brushed it with silver lust dust. I the same thing to the name and the other silver accent pieces on the cake. The bottom tier is a buttercream rosette design. The middle tier is a quilted pattern with silver dragees and then the top tier is all white with rhinestone wrap around the bottom.
This cake is pretty popular on my Facebook page which has got a slight overhaul and you can find it here, so much so that I am doing this cake again this weekend except in white and gold! So you know I will come back with pictures just to show the constrast of the two cakes.
Well I have to run but I will back this weekend to post more pretty cakes. Until next time..
Thursday, April 18, 2013
I'm Late..I'm Late...for a very important date:)!
Hi Ya'll!
So I'm not late for an important date...lol...but that little verse does set the tone for my blog post in that I will be talking about Alice in Wonderland! So I adore the original Alice in Wonderland like I'm sure most of you do.. I can't say the same about too many of the remakes that has made their way to the big screen..but I did most enjoy Tim Burton's remake of Alice in Wonderland with Johnnie Depp. I also love how Wonderland is one of the many different worlds in the series Once Upon a Time (oohhh I just love that show). So I thought it would be fitting to do a post on the theme of Alice in Wonderland.
Now if you are into cake decorating like I am then.. you have surely seen the spike in the number of cakes that have popped up on Google over the last year in that theme. I don't know the reason why but I love to see the different interpretations done in cake:)
Now this one for instance (no I didn't do this one...but mine is coming..hehehe) is the typical Alice in Wonderland theme cake you would see...with Alice falling into the rabbit hole and the clock for the late bunny. The stripes represents the Cheshire cat. This cake was done by Lilo Cakes .
Or you will have some like this.. that just takes a few elements like the cup from the Mad Hatter's tea party and Cheshire cat and completely make something different. This cake is ultra feminine while staying true to the theme of Alice in Wonderland. It also has a extra something in that it is in the topsy turvy style. This cake is by Design Cakes on Flickr.
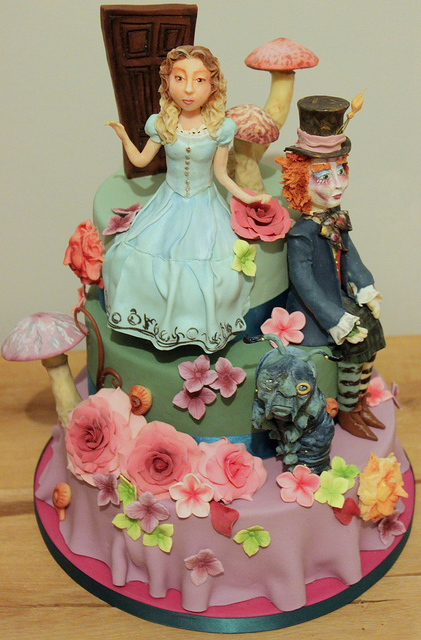
Or you can have great artistic version like this. I saw this one and fell in LOVE with the characters on the cake. I love how the rest of the cake is an elegant background to the detailedness of the characters. I do figures on some of my cakes..but these are extremely well done. I want my figures to look like that when they grow up:) The figures are very Tim Burton in style. This one was done by a designer across the pond, Sweet as Sugar Cakes in the UK is on Flickr as well.
So here is my version of Alice in Wonderland:)
As you can see mine has many classic characters of the movie like the Cheshire cat, the smoking worm and playing cards. This cake was topsy-turvy as well.. though not from this angle of the picture (trying to show off everything on the cake) and I will probably doing a sharper angle next time I do a cake like this but I do love the way everything came together on the cake. This was also for a baby shower which is why some of the colors are on the lighter scale. I also made "Alice" black since the mommy to be was black. I like to take personal elements of the person who the cake is for and put them into the cake. The most fun was making Alice and the top of the cake which is of course the Mad Hatter's hat:) The mommy to be loved the cake and everyone was so impressed with all of the characters I was able to get on the cake. Next time I would like to add either the Mad Hatter himself or the Queen of Hearts. Overall I am pleased and think I did a pretty good job... don't you???
Peace & Blessings
So I'm not late for an important date...lol...but that little verse does set the tone for my blog post in that I will be talking about Alice in Wonderland! So I adore the original Alice in Wonderland like I'm sure most of you do.. I can't say the same about too many of the remakes that has made their way to the big screen..but I did most enjoy Tim Burton's remake of Alice in Wonderland with Johnnie Depp. I also love how Wonderland is one of the many different worlds in the series Once Upon a Time (oohhh I just love that show). So I thought it would be fitting to do a post on the theme of Alice in Wonderland.
Now if you are into cake decorating like I am then.. you have surely seen the spike in the number of cakes that have popped up on Google over the last year in that theme. I don't know the reason why but I love to see the different interpretations done in cake:)
Now this one for instance (no I didn't do this one...but mine is coming..hehehe) is the typical Alice in Wonderland theme cake you would see...with Alice falling into the rabbit hole and the clock for the late bunny. The stripes represents the Cheshire cat. This cake was done by Lilo Cakes .
Or you will have some like this.. that just takes a few elements like the cup from the Mad Hatter's tea party and Cheshire cat and completely make something different. This cake is ultra feminine while staying true to the theme of Alice in Wonderland. It also has a extra something in that it is in the topsy turvy style. This cake is by Design Cakes on Flickr.
Or you can have great artistic version like this. I saw this one and fell in LOVE with the characters on the cake. I love how the rest of the cake is an elegant background to the detailedness of the characters. I do figures on some of my cakes..but these are extremely well done. I want my figures to look like that when they grow up:) The figures are very Tim Burton in style. This one was done by a designer across the pond, Sweet as Sugar Cakes in the UK is on Flickr as well.
So here is my version of Alice in Wonderland:)
As you can see mine has many classic characters of the movie like the Cheshire cat, the smoking worm and playing cards. This cake was topsy-turvy as well.. though not from this angle of the picture (trying to show off everything on the cake) and I will probably doing a sharper angle next time I do a cake like this but I do love the way everything came together on the cake. This was also for a baby shower which is why some of the colors are on the lighter scale. I also made "Alice" black since the mommy to be was black. I like to take personal elements of the person who the cake is for and put them into the cake. The most fun was making Alice and the top of the cake which is of course the Mad Hatter's hat:) The mommy to be loved the cake and everyone was so impressed with all of the characters I was able to get on the cake. Next time I would like to add either the Mad Hatter himself or the Queen of Hearts. Overall I am pleased and think I did a pretty good job... don't you???
Peace & Blessings
Friday, January 18, 2013
All About Swiss Meringue Buttercream
Hey Ya'll!
So from the title you can pretty much guess that I will be discussing Swiss Meringue Buttercream! Ohh my goodness I am absolutely in love with SMB (Swiss Meringue Buttercream). It is so silky and taste heavenly..it is a little cloud on a spoon..yes its just that good. Trust me when I say once you try it you will not want anything less!!! You will find many different recipes of SMB online but the base of the recipe is always the same...you heat egg whites and sugar to create a syrup and then you whip that into a meringue state. You then add in butter to make a light, fluffy buttercream that most cake decorators will tell you is hands down better than American Buttercream (the extra sugary stuff). There two other types of meringue buttercream (Italian and French) but I prefer SMB for the ease of it. It holds flavor wonderfully so you add simple flavors like vanilla extract or more complex flavors like fruit puree. It's simple enough in its concept that even a basic cake decorator can learn to make it by following the steps laid out.
If you would like more information about buttercream you can check out Sweetapolita's Blog for her post entitled Swiss Meringue Buttercream Demystified or Baker Royale's post on SMB under her baking basics posts: How to Make Swiss Meringue Buttercream Frosting. With that out of the way...on to the buttercream!!
The first thing you want to do when making SMB is make sure all of buttercream making supplies are grease-free. You have grease in your bowl or your whisk when you go to make your meringue it will look kind of "soupy" and not very meringue. You also want to make sure that your butter (real butter people please) is room temperature to make the mixing easier. I open up each stick of butter and let it sit out for a couple hours to come to room temp.
Next you want to measure you sugar and egg whites. I don't have a picture of this step because its pretty easy. Follow the recipe I provided below with the measuring of the sugar. For the egg whites...I recommend fresh ones. You will come across some decorators who have had success with egg whites in a carton, but I have had NO success using them..so fresh is best. If there a decorator out there who has had success with carton egg whites please let me know the brand and I will give it a try because I hate wasting the egg yolks.
Once your sugar/egg white syrup has reached at heating point of 160 degrees (to make sure you fully pasteurize the eggs, some decorators say 140 degrees but I stick with 160 degrees to be on the safe side). Remove the mixing bowl from the pot and put it on your mixer and run the mixer on medium (7 if you have a KithenAid). The next photo shows the meringue after a few minutes of mixing.
As you can see its shiny and starting to peak. That's good. You want to mix your meringue for about 10 minutes or so until you reach stiff peaks and the bowl is cool to the touch. You will know you hit stiff peaks if when you stop the mixer, remove the bowl and the meringue on the whisk stays there. The meringue will also have fluffed up and thick. I don't have a picture of the thick peak stage but you get the picture from the one up top and my description.
At this point you want to add in the butter a pat at a time making sure each pat of butter is fully incorporated before add in the next one (no lumps). As you add in the butter, you will notice that the SMB will start to take on a curdled look to it..NO WORRIES..keep adding butter and mixing.
You see how it sticks to the knife..that is what you want. It is one of the best tasting buttercreams EVER!!! Don't believe me...ask a cake decorator who has made it before..they will tell you they love the stuff. Don't be afraid..dive in and try it. Once you go SMB you won't go back:) If you still have some questions about it or any stage I discussed above...please see one of the posts I linked to earlier. They explain every aspect about SMB.
Swiss Meringue Buttercream-makes 10 cups of buttercream
Ingredients
10 large, fresh egg whites (300g)
2 1/2 cups sugar
3 cups unsalted butter (I use salted so I omit the pinch of salt), cut into cut cubes
4 teaspoons pure vanilla extract or 1 tablespoon of vanilla bean paste
pinch of salt
Directions:
1. Wipe the bowl of electric mixer with paper towel with lemon juice to remove any grease. Add egg whites and sugar. Simmer over a put of water, whisking constantly until temperature reaches 160F degrees. If you don't own a candy thermometer, then continue whisking until the sugar has been completely dissolved and the egg whites are hot.
2. With your whisk attachment on your mixer, begin to whip until meringue is thick, glossy and the bowl is cool to the touch. Don't add the butter until the bowl is cool.
3. Start adding butter cubes, one at a time, until incorporated and mix until the SMB is silk smooth in texture. If your SMB is runny then put in the fridge for 15 to 20 minutes to cool down and re-attach until it comes together (meringue wasn't cool). Add your vanilla and salt until well incorporated.
-Keep in airtight container in the fridge for up to one week, leaving out at room temperature when needed. Re-whipping when need for 5 minutes.
-SMB can be frozen for 6-8 weeks. Thaw on the counter overnight and then rewhip for 5 minutes.
So from the title you can pretty much guess that I will be discussing Swiss Meringue Buttercream! Ohh my goodness I am absolutely in love with SMB (Swiss Meringue Buttercream). It is so silky and taste heavenly..it is a little cloud on a spoon..yes its just that good. Trust me when I say once you try it you will not want anything less!!! You will find many different recipes of SMB online but the base of the recipe is always the same...you heat egg whites and sugar to create a syrup and then you whip that into a meringue state. You then add in butter to make a light, fluffy buttercream that most cake decorators will tell you is hands down better than American Buttercream (the extra sugary stuff). There two other types of meringue buttercream (Italian and French) but I prefer SMB for the ease of it. It holds flavor wonderfully so you add simple flavors like vanilla extract or more complex flavors like fruit puree. It's simple enough in its concept that even a basic cake decorator can learn to make it by following the steps laid out.
If you would like more information about buttercream you can check out Sweetapolita's Blog for her post entitled Swiss Meringue Buttercream Demystified or Baker Royale's post on SMB under her baking basics posts: How to Make Swiss Meringue Buttercream Frosting. With that out of the way...on to the buttercream!!
The first thing you want to do when making SMB is make sure all of buttercream making supplies are grease-free. You have grease in your bowl or your whisk when you go to make your meringue it will look kind of "soupy" and not very meringue. You also want to make sure that your butter (real butter people please) is room temperature to make the mixing easier. I open up each stick of butter and let it sit out for a couple hours to come to room temp.
See my sticks all laid out ready for some action:)
The next step to heat the sugar and egg white through the double-boiler method...I use my KitchenAid Mixer and set it over a bottle of simmering water. Making sure your water is not a rapid boil..you want to heat up the egg whites not cook them! And you don't want the water to touch the bottom of the bowl either=cooked egg whites. At this point I also cut up the sticks of butter into cubes as seen here:
Once your sugar/egg white syrup has reached at heating point of 160 degrees (to make sure you fully pasteurize the eggs, some decorators say 140 degrees but I stick with 160 degrees to be on the safe side). Remove the mixing bowl from the pot and put it on your mixer and run the mixer on medium (7 if you have a KithenAid). The next photo shows the meringue after a few minutes of mixing.
As you can see its shiny and starting to peak. That's good. You want to mix your meringue for about 10 minutes or so until you reach stiff peaks and the bowl is cool to the touch. You will know you hit stiff peaks if when you stop the mixer, remove the bowl and the meringue on the whisk stays there. The meringue will also have fluffed up and thick. I don't have a picture of the thick peak stage but you get the picture from the one up top and my description.
As this picture shows..my SMB is slightly pass the curdled stage.. its still looks slightly curdled but its starting to look like buttercream. Just keep adding your butter in a pat at a time until your butter is all gone. By the time you get to the last pieces of butter you will see a beautiful SMB come together. The picture below shows my SMB on the whisk. See how fluffy it looks but is sticking solidly to the whisk. That is what you want.
This is SMB once you have whipped all the butter together. It has a slightly yellow color to it (that is all the butter). It's light but holds its shape. You SMB is now done! At this one I would fill and crumb coat my cake if they are cooled at this point. SMB needs to be refrigerated if you aren't going to use it right away. You must note: when you bring SMB out of the fridge you have to let it come up to room temperature and run it through your mixer for a little bit.
Swiss Meringue Buttercream-makes 10 cups of buttercream
Ingredients
10 large, fresh egg whites (300g)
2 1/2 cups sugar
3 cups unsalted butter (I use salted so I omit the pinch of salt), cut into cut cubes
4 teaspoons pure vanilla extract or 1 tablespoon of vanilla bean paste
pinch of salt
Directions:
1. Wipe the bowl of electric mixer with paper towel with lemon juice to remove any grease. Add egg whites and sugar. Simmer over a put of water, whisking constantly until temperature reaches 160F degrees. If you don't own a candy thermometer, then continue whisking until the sugar has been completely dissolved and the egg whites are hot.
2. With your whisk attachment on your mixer, begin to whip until meringue is thick, glossy and the bowl is cool to the touch. Don't add the butter until the bowl is cool.
3. Start adding butter cubes, one at a time, until incorporated and mix until the SMB is silk smooth in texture. If your SMB is runny then put in the fridge for 15 to 20 minutes to cool down and re-attach until it comes together (meringue wasn't cool). Add your vanilla and salt until well incorporated.
-Keep in airtight container in the fridge for up to one week, leaving out at room temperature when needed. Re-whipping when need for 5 minutes.
-SMB can be frozen for 6-8 weeks. Thaw on the counter overnight and then rewhip for 5 minutes.
Monday, December 17, 2012
Finally.... A Lorax Cake!
Good Afternoon Ya'll!
I hope you all are having a good day today, for us in Philadelphia it has been raining for the last couple of days and today is no exception. So on this rainy day I have decided to blog a little bit. I had been waiting all year to do a cake like this.. I have seen plenty of pictures on the internet from other cake decorators but no one had ordered from me until a couple of weeks ago! Yes folks, I finally got to do a Lorax theme birthday cake:) See for us cake decorators we love it when we get to do new characters or design we haven't done yet.. it gets kind of boring doing the same cakes. So when an old York client L, asked me if I could do a Lorax theme cake for his daughter I jumped at the chance to do it. I have been wanting to do a Lorax figure for a while now... of course he was the first thing I made for the cake. Of course I made some Truffula trees to go on the cake as well. I love the meaning behind the story and I think the movie was soo cute. I think kids are never to young to learn more about conservation efforts.
The only thing that dampened my mood when the cake was done was realizing now I have to drive 2 hours to deliver it back to York. So I packed up the cake. Jayden and myself and we made the trip back to York to drop off the cake. By the time I got back home it was already dark and half the day was gone so from that experience I have decided that unless its for a huge party cake or a wedding, I will be limiting by deliveries to York. It just takes up too much of my time to deliver just one cake. I love my York customers but doing that drive all the time is a bit much. Other than that, this cake was soo much fun to make.. I hope I get to make another so I can do something a little different.
Peace & Blessings
I hope you all are having a good day today, for us in Philadelphia it has been raining for the last couple of days and today is no exception. So on this rainy day I have decided to blog a little bit. I had been waiting all year to do a cake like this.. I have seen plenty of pictures on the internet from other cake decorators but no one had ordered from me until a couple of weeks ago! Yes folks, I finally got to do a Lorax theme birthday cake:) See for us cake decorators we love it when we get to do new characters or design we haven't done yet.. it gets kind of boring doing the same cakes. So when an old York client L, asked me if I could do a Lorax theme cake for his daughter I jumped at the chance to do it. I have been wanting to do a Lorax figure for a while now... of course he was the first thing I made for the cake. Of course I made some Truffula trees to go on the cake as well. I love the meaning behind the story and I think the movie was soo cute. I think kids are never to young to learn more about conservation efforts.
The only thing that dampened my mood when the cake was done was realizing now I have to drive 2 hours to deliver it back to York. So I packed up the cake. Jayden and myself and we made the trip back to York to drop off the cake. By the time I got back home it was already dark and half the day was gone so from that experience I have decided that unless its for a huge party cake or a wedding, I will be limiting by deliveries to York. It just takes up too much of my time to deliver just one cake. I love my York customers but doing that drive all the time is a bit much. Other than that, this cake was soo much fun to make.. I hope I get to make another so I can do something a little different.
Peace & Blessings
Tuesday, March 2, 2010
Light Week
Well so far this week. I only had one cake to do which is somewhat nice so I can work on the house. Every time I have a lot of cake orders, the things I did to do in the house gets behind. So I am able to check up this week :) The one cake order I had was for a sweet sixteen with a twist. She wasn't girlie at all and the mother said that she liked dark colors which really doesn't work when you are dyeing fondant. I told the mother that black fondant does not taste good when she said her daughter liked black. So we decided on purple and a darker green. The color combination looks a little willy wonka ish, if you ask me but hey I do what the clients want. So jazzed it up some swirls because it looked a little sparse. But you are on your worst critic.When I delivered it the dad was so surprised, he said he liked the way it looked.I did like the way the writing came out. My writer's swing is getting better and better. I also bent the wires this time to do something different, next time I think I will use some curled wire and see what happens. Another successful order completed!
I finished my second decorating class today and it felt great because the cake that I did, came out great! I also learned how to make about 7 different flowers using royal icing. This was something I was definitely lacking so now I am increasing my basic cake decorating knowledge which is definitely valuable especially doing wedding cakes. Below is finally class cake I had to make. It is pound cake with vanilla buttercream. The outside is done in a basket weave pattern with a border top and bottom. All of the flowers I did with royal icing. I signed up for the third class tonight before I came home and can't wait til it starts. I am going to learn more difficult flowers and some more borders. I don't get many orders for buttercream covered cakes, but when I do I want to be able to offer them just as many offers as I have with customers ordering cakes in fondant. I have to do another small cake tomorrow for my husband's friend's birthday. So I will posting those pics tomorrow. I also got my second wedding order for May. I want a small cake and a dessert buffet which is going to be fun for me to do because I get to be creative with the tablescape. I am also doing their centerpieces. Now I know that isn't konfection related but I want to get some aspects of event planning under my belt and I figured starting out small like making centerpieces will give me experience and let me be creative as well. She was telling me her idea for a centerpieces and I came up with a better option which she loved. Part 2 of this post coming tomorrow....
Subscribe to:
Posts (Atom)